


User Manual

Product Overview
Package List


Optional Accessories
Components Details

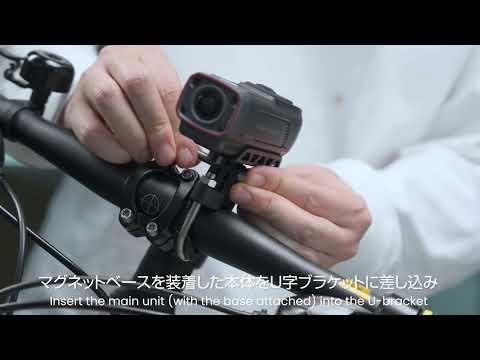
Mount Installation

Title


Waterproof Charging Cable Connection

MicroSD Card Requirements

Basic Operations & LED Status Guide
Title
Title
Title
Title
Title
Title
Title
Title
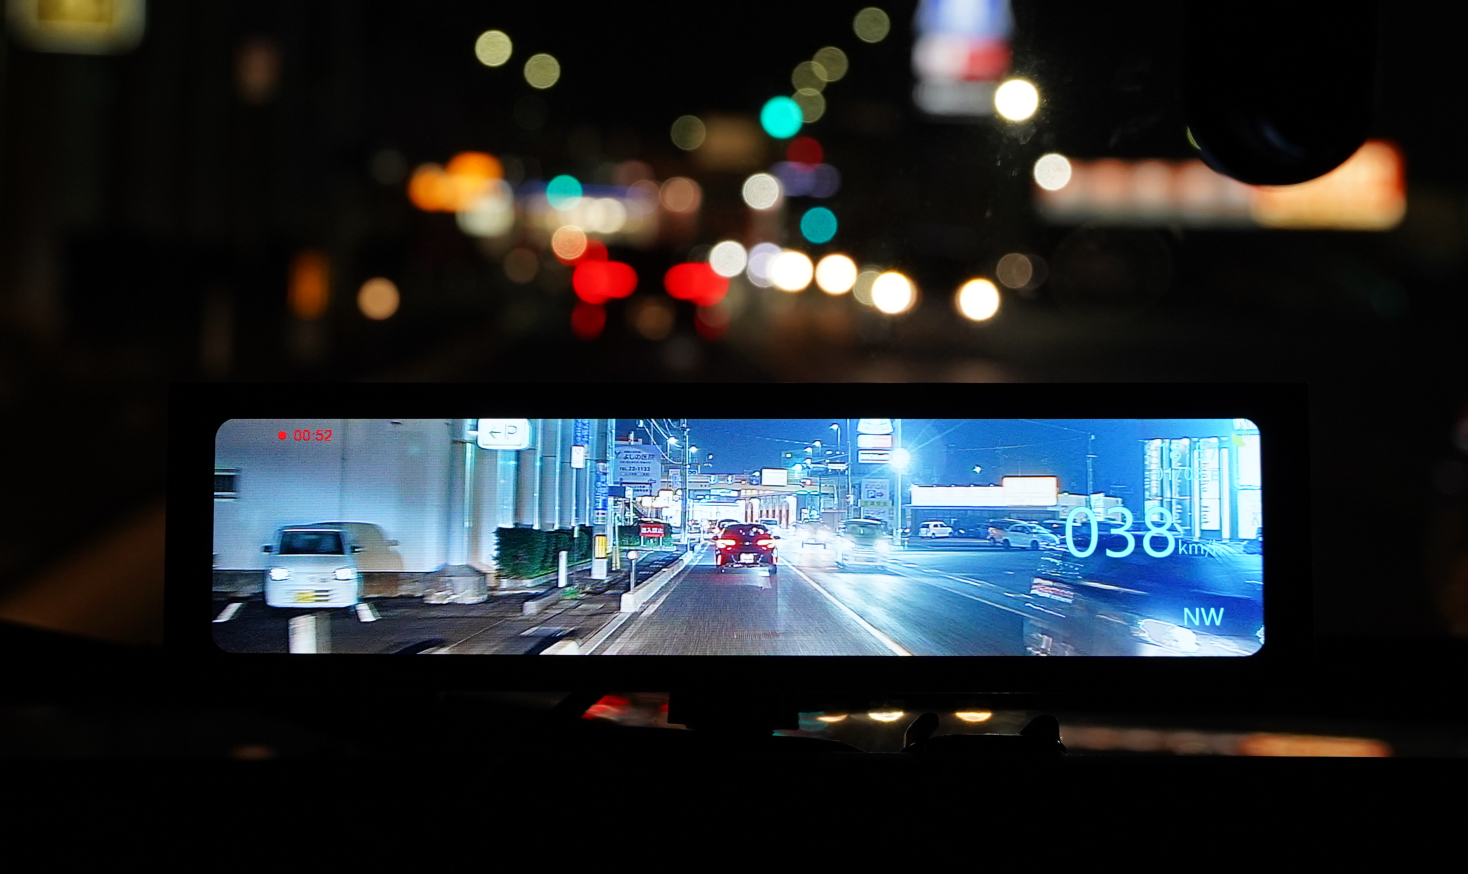
Screen Functions Overview


Title


App Overview


Power Saving Mode


Recording Functions
App Settings
Title
Title
Title
Title
Title
Title
Title
Title
Title
Title
Title
Title
Title
Title
Title
Title
Title
Title
Title
Title
Title
Title
Title
Viewing Recorded Videos and Photos


Factory Reset


Firmware Update

